
How to Contour Your Face Like A Pro
-
Dorcas Akintoye

- September 11, 2024
Contouring is a crucial makeup technique that will help you accentuate your features and achieve a sculpted appearance. Even if you’re a newbie, you can contour your face like an expert with the appropriate skills and some practice. This article will walk you through six easy, step-by-step techniques for contouring your face to give it a clean, finished look.

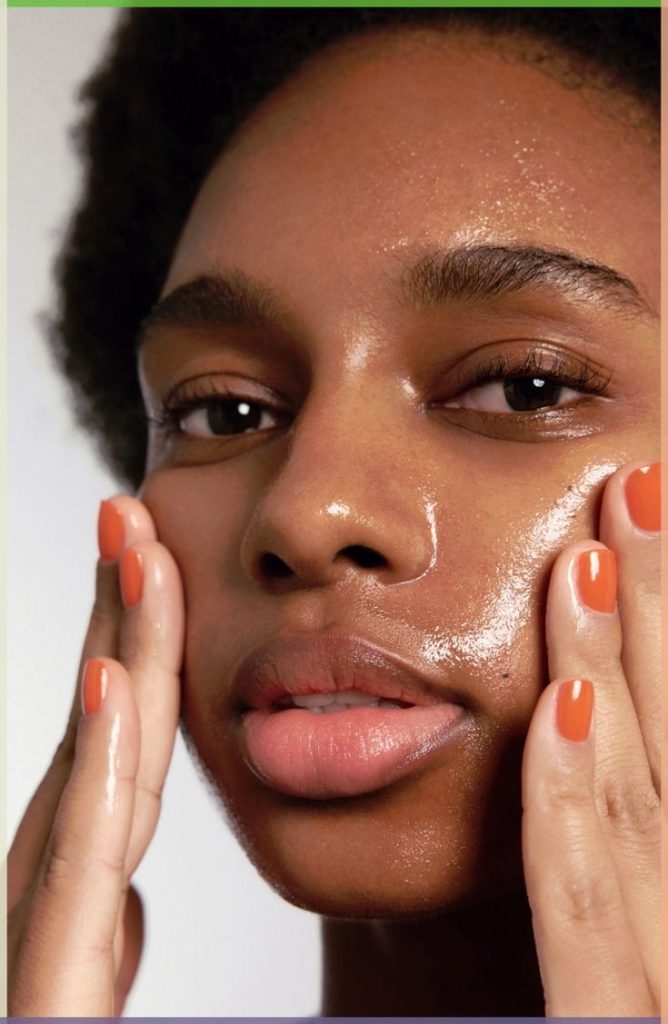
(1) START WITH A CLEAN, MOISTURISED FACE
You should start with a clean, well-moisturised face before applying any makeup. While moisturising keeps your skin nourished and smooth, cleansing removes debris and oil that can interfere with applying makeup. Your contouring will look more natural if your base is smooth and your contour products blend in with your skin. Applying a primer afterwards will help your makeup stay put longer and prevent it from slipping during the day.
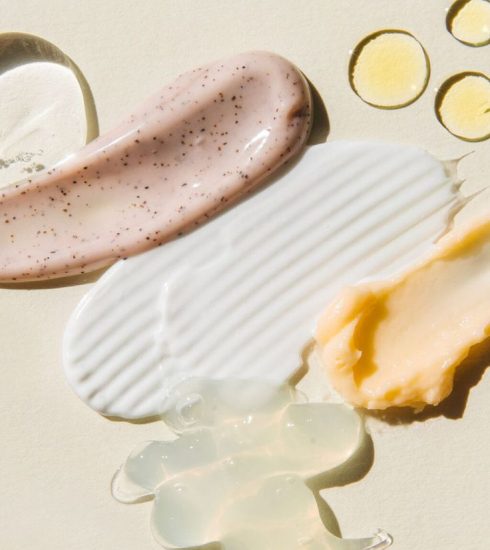
(2) CHOOSE THE RIGHT CONTOUR PRODUCTS
With the appropriate products, you may get a perfect contour. You will require a highlighter that is two shades lighter and a contour product that is about two shades darker than your natural skin tone. Sticks, creams, and powders are just a few of the various forms of contour cosmetics. While powders work well for setting the contour and providing a matte look, creams and sticks are more user-friendly and ideal for novice blending. When choosing makeup, be careful to take into account your skin type. For instance, powder contour may be a better fit for someone with oily skin.

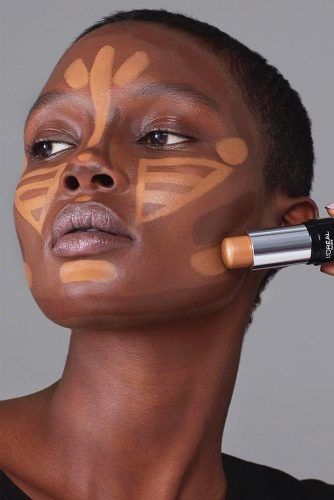
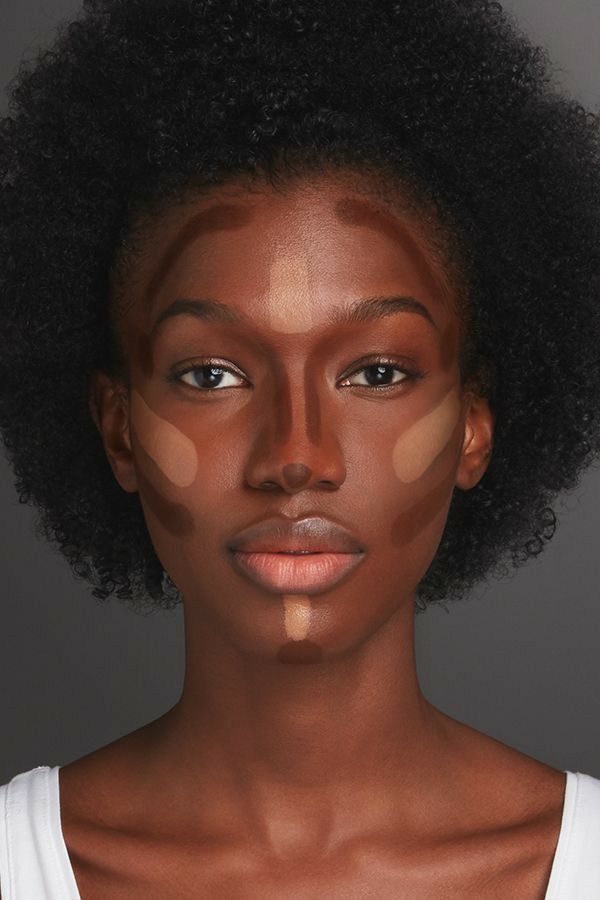
(3) MAP OUT YOUR CONTOUR AREAS
When it comes to contouring, you need to map out the part where you want to contour. The general rule is to contour the areas where shadows naturally fall on your face. These areas include the hollows of your cheeks, your jawline, the side of your nose, and lastly, your forehead.
(4) BLEND, BLEND, BLEND
The most crucial phase of contouring is blending. After you’ve drawn out the areas you want to highlight, use a blending brush, beauty sponge, or your fingers to blend the contour product into your skin. To prevent sharp edges, blend using tiny, circular movements. The contour should appear to be a natural shadow effect, blending perfectly with your skin. When it comes to contouring, a poorly blended look can leave your makeup looking uneven and unrealistic, so take your time.

(5) HIGHLIGHT THE HIGH POINTS OF YOUR FACE
The opposite of contouring is highlighting. Highlighting accentuates the high points on your face to give the illusion of a more elevated appearance, whereas contouring adds depth and shadows. You can apply a highlighter to the following areas of your face: the top of your cheekbones, the bridge of your nose, the centre of your forehead, and lastly, under your eyes.
(6) SET YOUR MAKEUP
Setting your makeup is essential to ensure it stays in place throughout the day after you finish highlighting and contouring. Dust a little amount of translucent setting powder over your face, paying particular attention to the areas you highlighted and contoured. This helps absorb any extra oil and seal the makeup, leaving you with a matte, flawless finish. Setting sprays hold makeup in place without looking overly matte, so if you like a dewy appearance, use them in place of powder.

CONCLUSION
By following these six steps, you can get a professional-looking contour that highlights your natural features and gives you a polished finish. If you persevere, you’ll become an expert at contouring. Remember that practice makes perfect.

Dorcas Akintoye is a versatile writer with a passion for beauty, fashion, relationships, and culinary delight. With a keen eye for detail and a passion for storytelling, she adds a touch of elegance to every topic she explores. She is a writer at THEWILL DOWNTOWN.
- Dorcas Akintoye
- Dorcas Akintoye
- Dorcas Akintoye
- Dorcas Akintoye
- Dorcas Akintoye
- Dorcas Akintoye
- Dorcas Akintoye
- Dorcas Akintoye
- Dorcas Akintoye
- Dorcas Akintoye
- Dorcas Akintoye
- Dorcas Akintoye
- Dorcas Akintoye
- Dorcas Akintoye
- Dorcas Akintoye
- Dorcas Akintoye
- Dorcas Akintoye
- Dorcas Akintoye
- Dorcas Akintoye
- Dorcas Akintoye
- Dorcas Akintoye
- Dorcas Akintoye
- Dorcas Akintoye
- Dorcas Akintoye
- Dorcas Akintoye
- Dorcas Akintoye
- Dorcas Akintoye
- Dorcas Akintoye
- Dorcas Akintoye
- Dorcas Akintoye
- Dorcas Akintoye
- Dorcas Akintoye
- Dorcas Akintoye
- Dorcas Akintoye
- Dorcas Akintoye
- Dorcas Akintoye
- Dorcas Akintoye
- Dorcas Akintoye
- Dorcas Akintoye
- Dorcas Akintoye
- Dorcas Akintoye
- Dorcas Akintoye
- Dorcas Akintoye
- Dorcas Akintoye
- Dorcas Akintoye
- Dorcas Akintoye
- Dorcas Akintoye
- Dorcas Akintoye
- Dorcas Akintoye
- Dorcas Akintoye
- Dorcas Akintoye
- Dorcas Akintoye
- Dorcas Akintoye
- Dorcas Akintoye
- Dorcas Akintoye
- Dorcas Akintoye
- Dorcas Akintoye
- Dorcas Akintoye
- Dorcas Akintoye
- Dorcas Akintoye
- Dorcas Akintoye
- Dorcas Akintoye
- Dorcas Akintoye
- Dorcas Akintoye
- Dorcas Akintoye
- Dorcas Akintoye
- Dorcas Akintoye
- Dorcas Akintoye
- Dorcas Akintoye
- Dorcas Akintoye
- Dorcas Akintoye
- Dorcas Akintoye
- Dorcas Akintoye
- Dorcas Akintoye
- Dorcas Akintoye
- Dorcas Akintoye
- Dorcas Akintoye
- Dorcas Akintoye
- Dorcas Akintoye
- Dorcas Akintoye
- Dorcas Akintoye
- Dorcas Akintoye
- Dorcas Akintoye
- Dorcas Akintoye
- Dorcas Akintoye
- Dorcas Akintoye
- Dorcas Akintoye
- Dorcas Akintoye
- Dorcas Akintoye
- Dorcas Akintoye
- Dorcas Akintoye
- Dorcas Akintoye
- Dorcas Akintoye
- Dorcas Akintoye
- Dorcas Akintoye
- Dorcas Akintoye
- Dorcas Akintoye
- Dorcas Akintoye
- Dorcas Akintoye
- Dorcas Akintoye
- Dorcas Akintoye
- Dorcas Akintoye
- Dorcas Akintoye
- Dorcas Akintoye
- Dorcas Akintoye
- Dorcas Akintoye
- Dorcas Akintoye
- Dorcas Akintoye
- Dorcas Akintoye
- Dorcas Akintoye
- Dorcas Akintoye
- Dorcas Akintoye
- Dorcas Akintoye
- Dorcas Akintoye
- Dorcas Akintoye
- Dorcas Akintoye
- Dorcas Akintoye
- Dorcas Akintoye
- Dorcas Akintoye
- Dorcas Akintoye
- Dorcas Akintoye
- Dorcas Akintoye
- Dorcas Akintoye
- Dorcas Akintoye
- Dorcas Akintoye
- Dorcas Akintoye
- Dorcas Akintoye
- Dorcas Akintoye
- Dorcas Akintoye
- Dorcas Akintoye
- Dorcas Akintoye
- Dorcas Akintoye
- Dorcas Akintoye
- Dorcas Akintoye
- Dorcas Akintoye
- Dorcas Akintoye
- Dorcas Akintoye
- Dorcas Akintoye
- Dorcas Akintoye
- Dorcas Akintoye
- Dorcas Akintoye
- Dorcas Akintoye
- Dorcas Akintoye
- Dorcas Akintoye
- Dorcas Akintoye
- Dorcas Akintoye
- Dorcas Akintoye
- Dorcas Akintoye
- Dorcas Akintoye
- Dorcas Akintoye
- Dorcas Akintoye
- Dorcas Akintoye
- Dorcas Akintoye
- Dorcas Akintoye
- Dorcas Akintoye
- Dorcas Akintoye
- Dorcas Akintoye
- Dorcas Akintoye
- Dorcas Akintoye
- Dorcas Akintoye
- Dorcas Akintoye
- Dorcas Akintoye
- Dorcas Akintoye
- Dorcas Akintoye
- Dorcas Akintoye
- Dorcas Akintoye
- Dorcas Akintoye
- Dorcas Akintoye
- Dorcas Akintoye
- Dorcas Akintoye
- Dorcas Akintoye
- Dorcas Akintoye
- Dorcas Akintoye
- Dorcas Akintoye
- Dorcas Akintoye
- Dorcas Akintoye
- Dorcas Akintoye
- Dorcas Akintoye
- Dorcas Akintoye
- Dorcas Akintoye
- Dorcas Akintoye
- Dorcas Akintoye
- Dorcas Akintoye
- Dorcas Akintoye
- Dorcas Akintoye
- Dorcas Akintoye
- Dorcas Akintoye
- Dorcas Akintoye
- Dorcas Akintoye
- Dorcas Akintoye
- Dorcas Akintoye
- Dorcas Akintoye
- Dorcas Akintoye
- Dorcas Akintoye
- Dorcas Akintoye
- Dorcas Akintoye
- Dorcas Akintoye
- Dorcas Akintoye
- Dorcas Akintoye
- Dorcas Akintoye
- Dorcas Akintoye
- Dorcas Akintoye
- Dorcas Akintoye
- Dorcas Akintoye
- Dorcas Akintoye
- Dorcas Akintoye
- Dorcas Akintoye
- Dorcas Akintoye
- Dorcas Akintoye
- Dorcas Akintoye
- Dorcas Akintoye
- Dorcas Akintoye
- Dorcas Akintoye
- Dorcas Akintoye
- Dorcas Akintoye
- Dorcas Akintoye
- Dorcas Akintoye
- Dorcas Akintoye
- Dorcas Akintoye
- Dorcas Akintoye
- Dorcas Akintoye
- Dorcas Akintoye
- Dorcas Akintoye
- Dorcas Akintoye
- Dorcas Akintoye
- Dorcas Akintoye
- Dorcas Akintoye
- Dorcas Akintoye
- Dorcas Akintoye
- Dorcas Akintoye
- Dorcas Akintoye
- Dorcas Akintoye
- Dorcas Akintoye
- Dorcas Akintoye
- Dorcas Akintoye
- Dorcas Akintoye
- Dorcas Akintoye
- Dorcas Akintoye
- Dorcas Akintoye
- Dorcas Akintoye
- Dorcas Akintoye
- Dorcas Akintoye
- Dorcas Akintoye
- Dorcas Akintoye
- Dorcas Akintoye
- Dorcas Akintoye
- Dorcas Akintoye
- Dorcas Akintoye
- Dorcas Akintoye
- Dorcas Akintoye
- Dorcas Akintoye
- Dorcas Akintoye
- Dorcas Akintoye
- Dorcas Akintoye
- Dorcas Akintoye
- Dorcas Akintoye
- Dorcas Akintoye
- Dorcas Akintoye
- Dorcas Akintoye
- Dorcas Akintoye
- Dorcas Akintoye
- Dorcas Akintoye
- Dorcas Akintoye
- Dorcas Akintoye
- Dorcas Akintoye
- Dorcas Akintoye
- Dorcas Akintoye
- Dorcas Akintoye
- Dorcas Akintoye
- Dorcas Akintoye
- Dorcas Akintoye
- Dorcas Akintoye
- Dorcas Akintoye
- Dorcas Akintoye
- Dorcas Akintoye
- Dorcas Akintoye
- Dorcas Akintoye
- Dorcas Akintoye
- Dorcas Akintoye
- Dorcas Akintoye
- Dorcas Akintoye
- Dorcas Akintoye
- Dorcas Akintoye
- Dorcas Akintoye
- Dorcas Akintoye
- Dorcas Akintoye
- Dorcas Akintoye
- Dorcas Akintoye
- Dorcas Akintoye
- Dorcas Akintoye
- Dorcas Akintoye
- Dorcas Akintoye
- Dorcas Akintoye
- Dorcas Akintoye
- Dorcas Akintoye
- Dorcas Akintoye
- Dorcas Akintoye
- Dorcas Akintoye
- Dorcas Akintoye
- Dorcas Akintoye
- Dorcas Akintoye
- Dorcas Akintoye
- Dorcas Akintoye
- Dorcas Akintoye
- Dorcas Akintoye
- Dorcas Akintoye
- Dorcas Akintoye
- Dorcas Akintoye
- Dorcas Akintoye
- Dorcas Akintoye
- Dorcas Akintoye
- Dorcas Akintoye
- Dorcas Akintoye
- Dorcas Akintoye
- Dorcas Akintoye
- Dorcas Akintoye
- Dorcas Akintoye
- Dorcas Akintoye
- Dorcas Akintoye
- Dorcas Akintoye
- Dorcas Akintoye
- Dorcas Akintoye
- Dorcas Akintoye
- Dorcas Akintoye
- Dorcas Akintoye
- Dorcas Akintoye
- Dorcas Akintoye
- Dorcas Akintoye
- Dorcas Akintoye
- Dorcas Akintoye
- Dorcas Akintoye
- Dorcas Akintoye
- Dorcas Akintoye
- Dorcas Akintoye
- Dorcas Akintoye
- Dorcas Akintoye
- Dorcas Akintoye
- Dorcas Akintoye
- Dorcas Akintoye
- Dorcas Akintoye
- Dorcas Akintoye
- Dorcas Akintoye
- Dorcas Akintoye
- Dorcas Akintoye
- Dorcas Akintoye
- Dorcas Akintoye
- Dorcas Akintoye
- Dorcas Akintoye
- Dorcas Akintoye
- Dorcas Akintoye
- Dorcas Akintoye
- Dorcas Akintoye
- Dorcas Akintoye
- Dorcas Akintoye
- Dorcas Akintoye
- Dorcas Akintoye
- Dorcas Akintoye
- Dorcas Akintoye
- Dorcas Akintoye
- Dorcas Akintoye
- Dorcas Akintoye
- Dorcas Akintoye
- Dorcas Akintoye
- Dorcas Akintoye
- Dorcas Akintoye
- Dorcas Akintoye
- Dorcas Akintoye
- Dorcas Akintoye
- Dorcas Akintoye
- Dorcas Akintoye
- Dorcas Akintoye
- Dorcas Akintoye
- Dorcas Akintoye
- Dorcas Akintoye
- Dorcas Akintoye
- Dorcas Akintoye
- Dorcas Akintoye
- Dorcas Akintoye
- Dorcas Akintoye
- Dorcas Akintoye
- Dorcas Akintoye
- Dorcas Akintoye
- Dorcas Akintoye
- Dorcas Akintoye
- Dorcas Akintoye
- Dorcas Akintoye
- Dorcas Akintoye
- Dorcas Akintoye
- Dorcas Akintoye
- Dorcas Akintoye
- Dorcas Akintoye
- Dorcas Akintoye
- Dorcas Akintoye
- Dorcas Akintoye
- Dorcas Akintoye
- Dorcas Akintoye
- Dorcas Akintoye
- Dorcas Akintoye
- Dorcas Akintoye
- Dorcas Akintoye
About Author / Dorcas Akintoye
Dorcas Akintoye is a versatile writer with a passion for beauty, fashion, relationships, and culinary delight. With a keen eye for detail and a passion for storytelling, she adds a touch of elegance to every topic she explores. She is a writer at THEWILL DOWNTOWN.